Check before installation
Before you start, check that there is enough space to install the product, that the screen door will not block other products once installed, and that the wall thickness is sufficient for the supplied screws.
Warning! For safety, be aware of wiring and electrical components in the installation area. When drilling or screwing, take particular account of wiring that is not visible.
Reversing the closing direction
By default the screen door closes from left to right. You can reverse it so that it closes from right to left. Follow the steps below.
- Lay the two side profiles on a flat surface. Slide the profile containing the mesh package (with the drawbeam on it) out of the left side profile, and slide the closure profile out of the right side profile. Keep the two parts connected to each other by the cord.
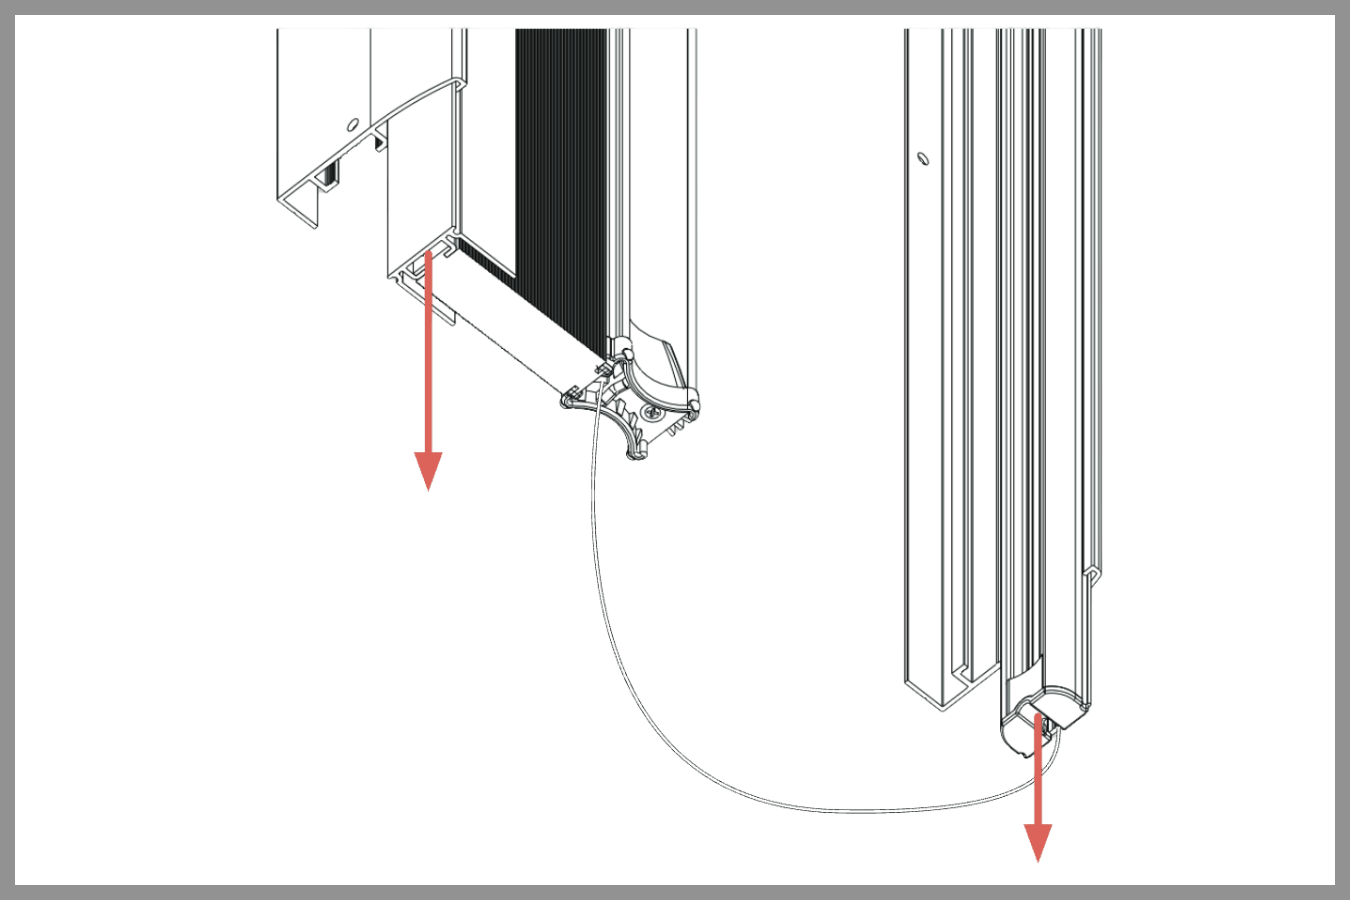
- Turn (swap) the two parts you have just removed.
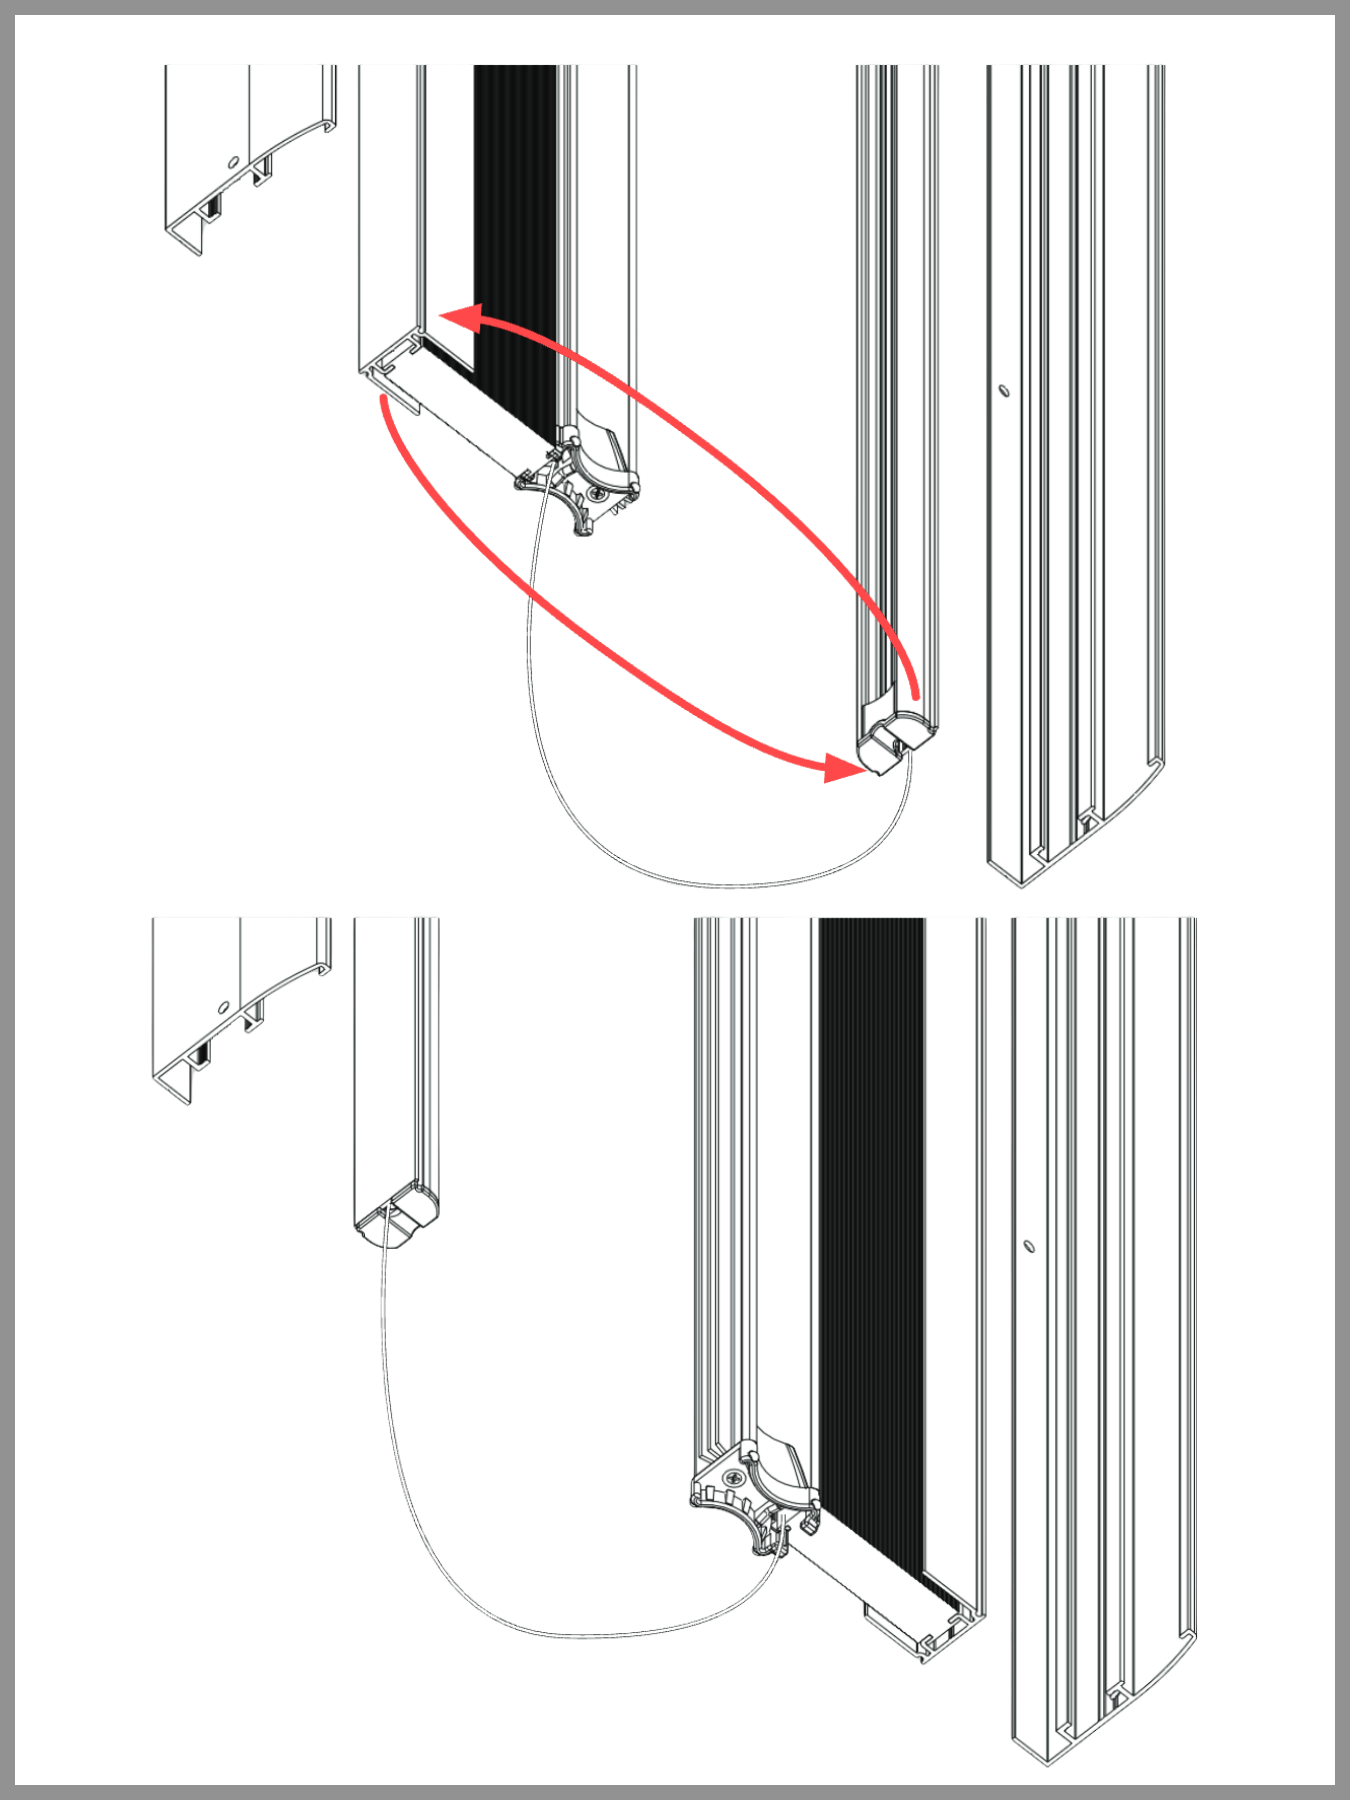
- Slide the profile with the mesh package and drawbeam back into the right side profile, and slide the closure profile into the left side profile.
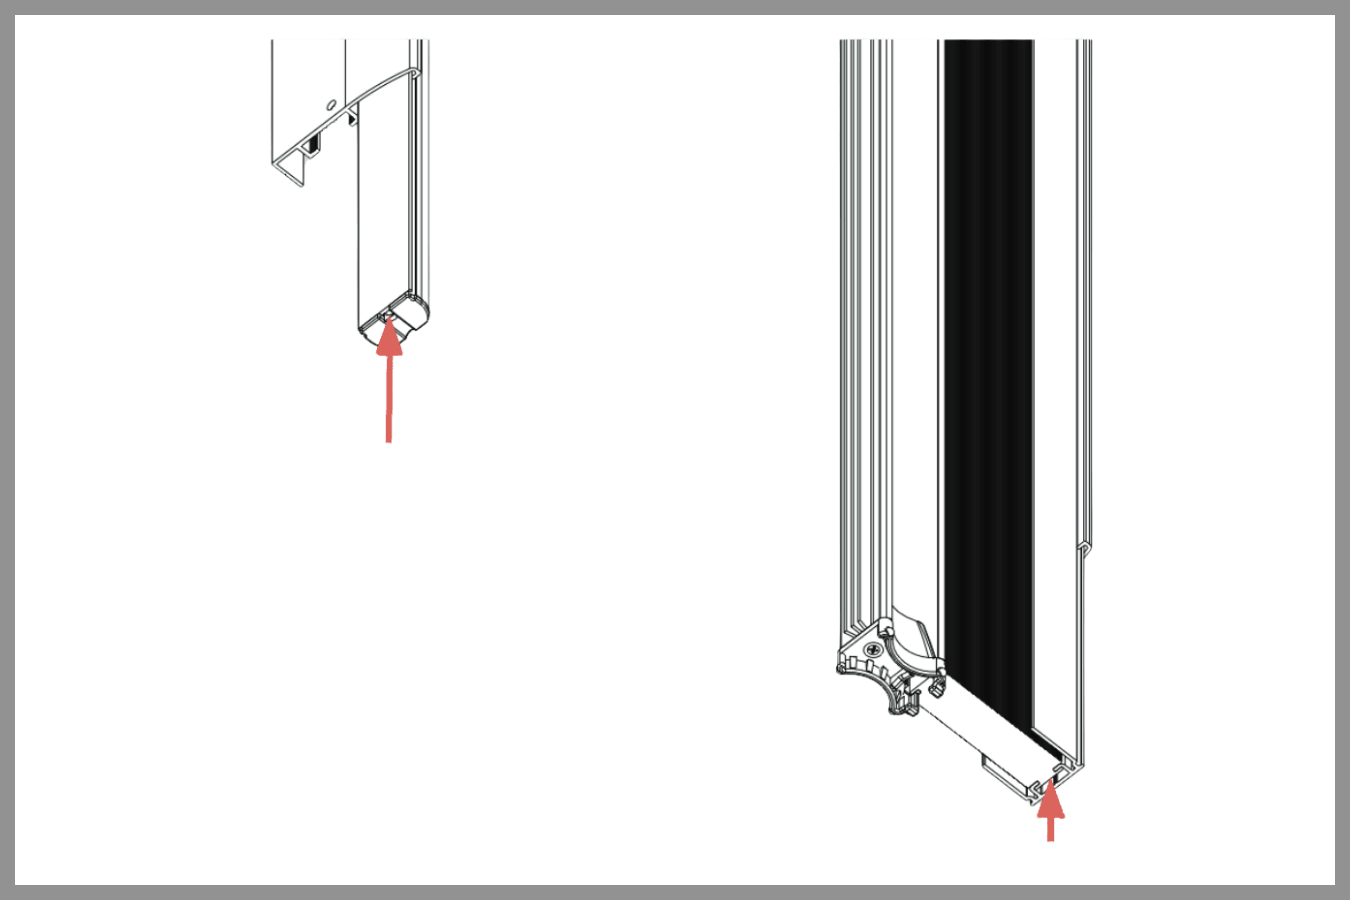
Note: Do not turn the profile with the mesh package and the closure profile end-over-end (lengthwise). The bottom of the drawbeam must stay at the bottom of the screen door.
Assembly
Before the product can be installed it must be assembled. Follow the steps below.
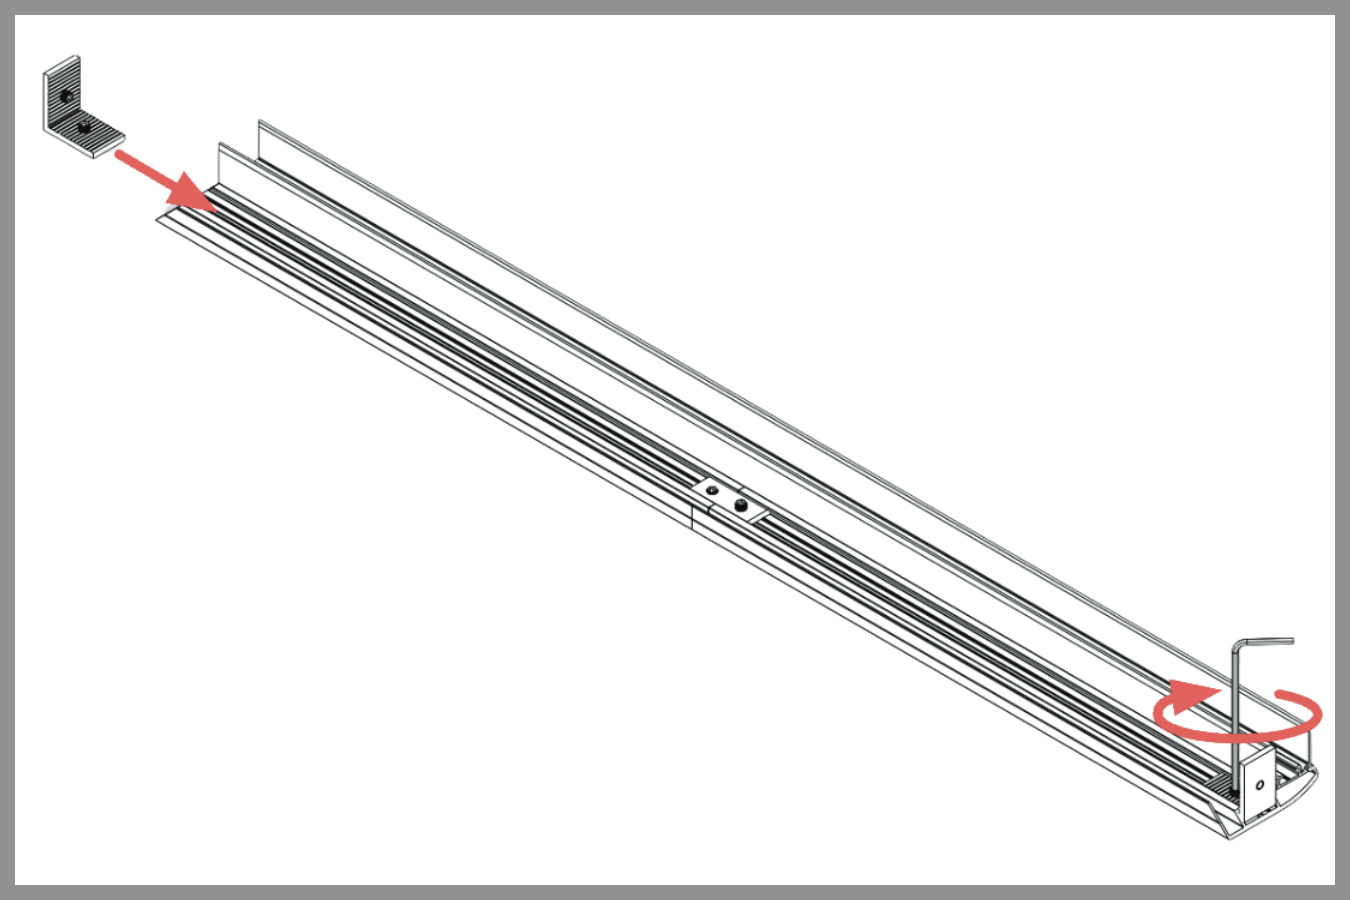
- Slide the corner connectors into the same channel as the connection piece of the top profile, and tighten the corner connectors with the 2.5 mm Allen key.
- Slide the top profile (with the corner connectors) into the two side profiles.
Note: When fitting the top profile, take care that the cords do not get caught between the sections.
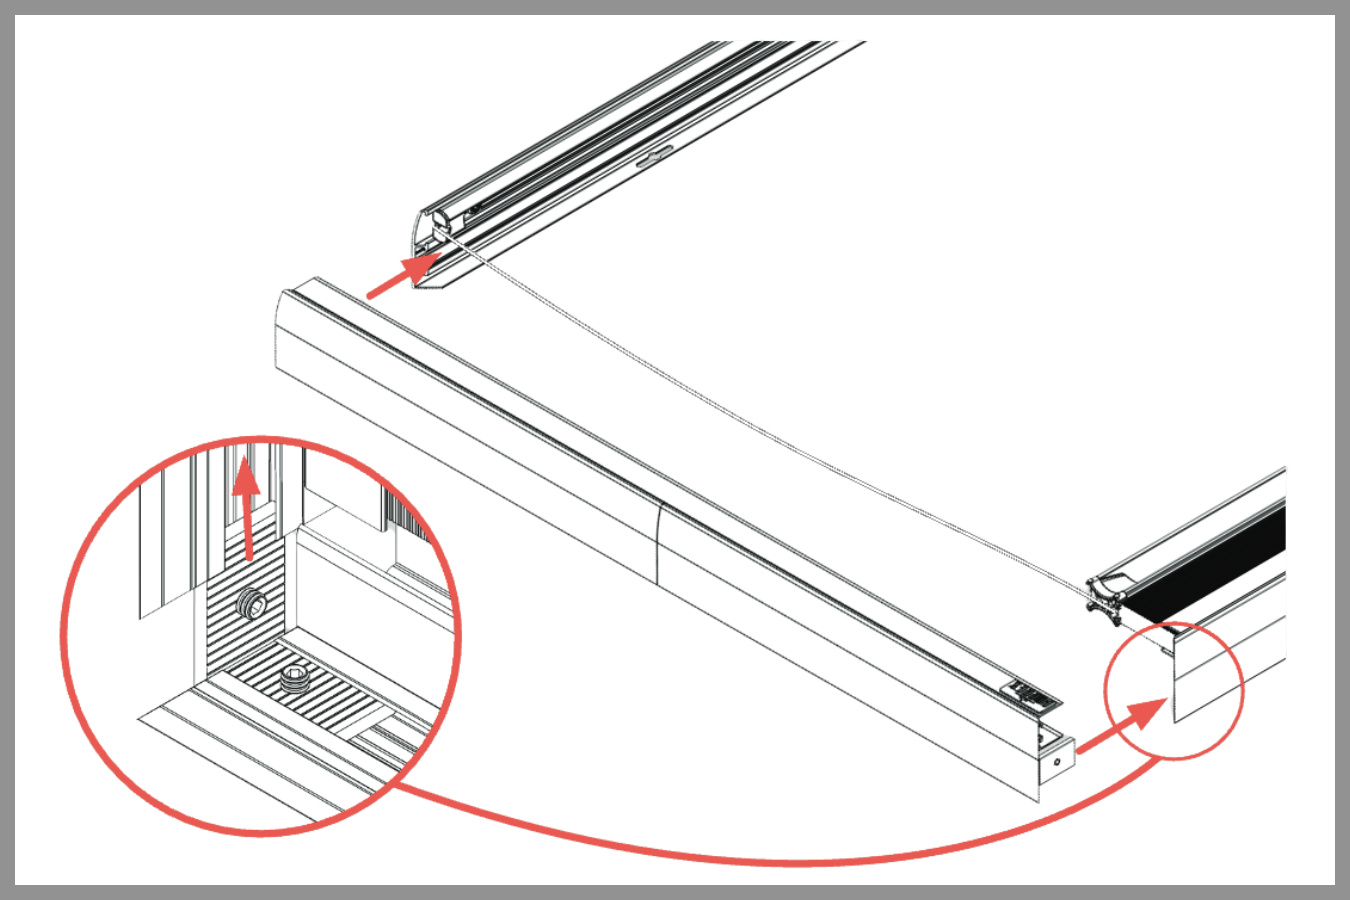
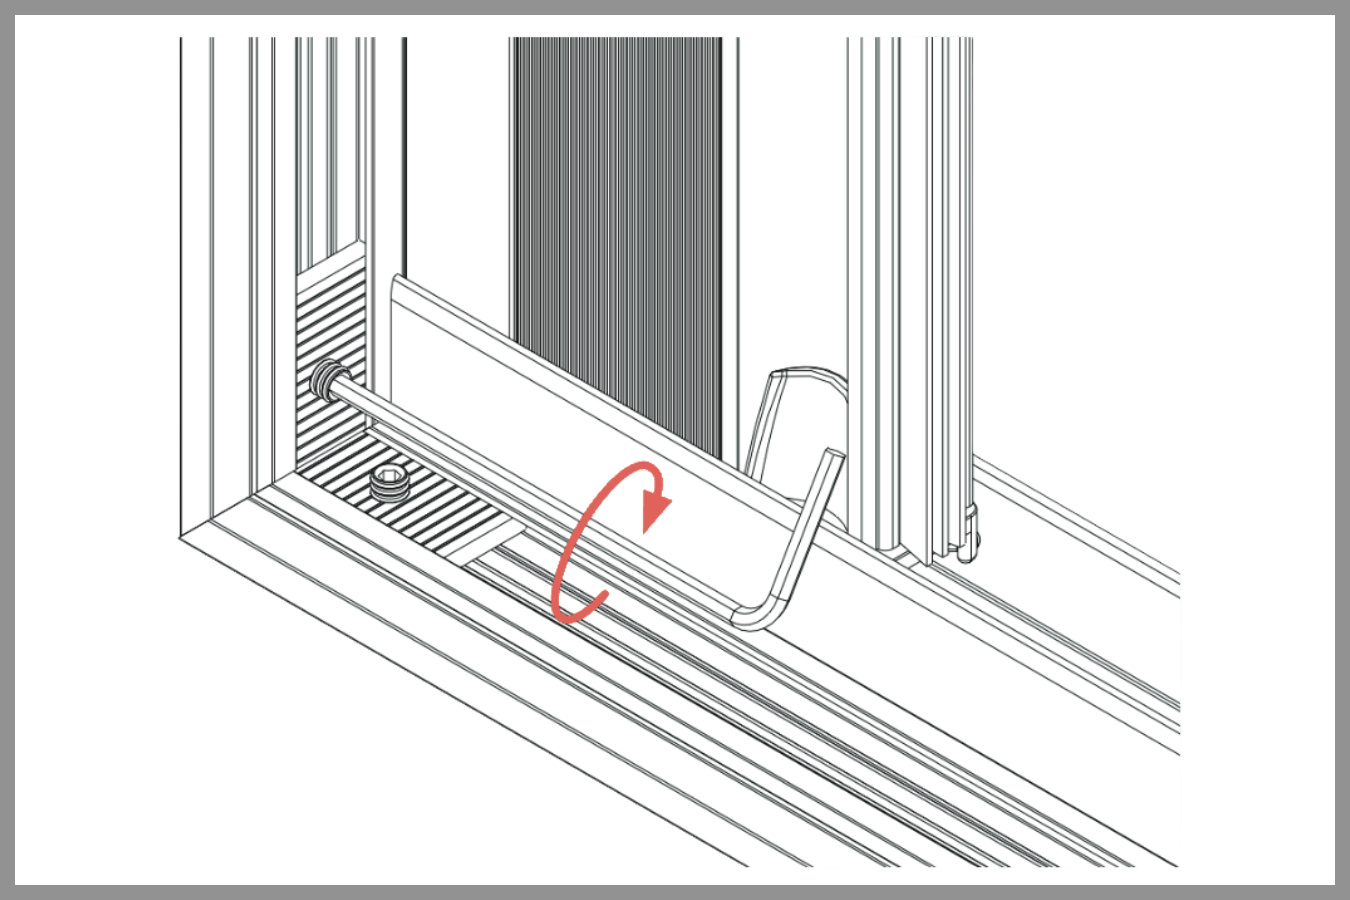
- Tighten the corner connectors in both side profiles with the Allen key.
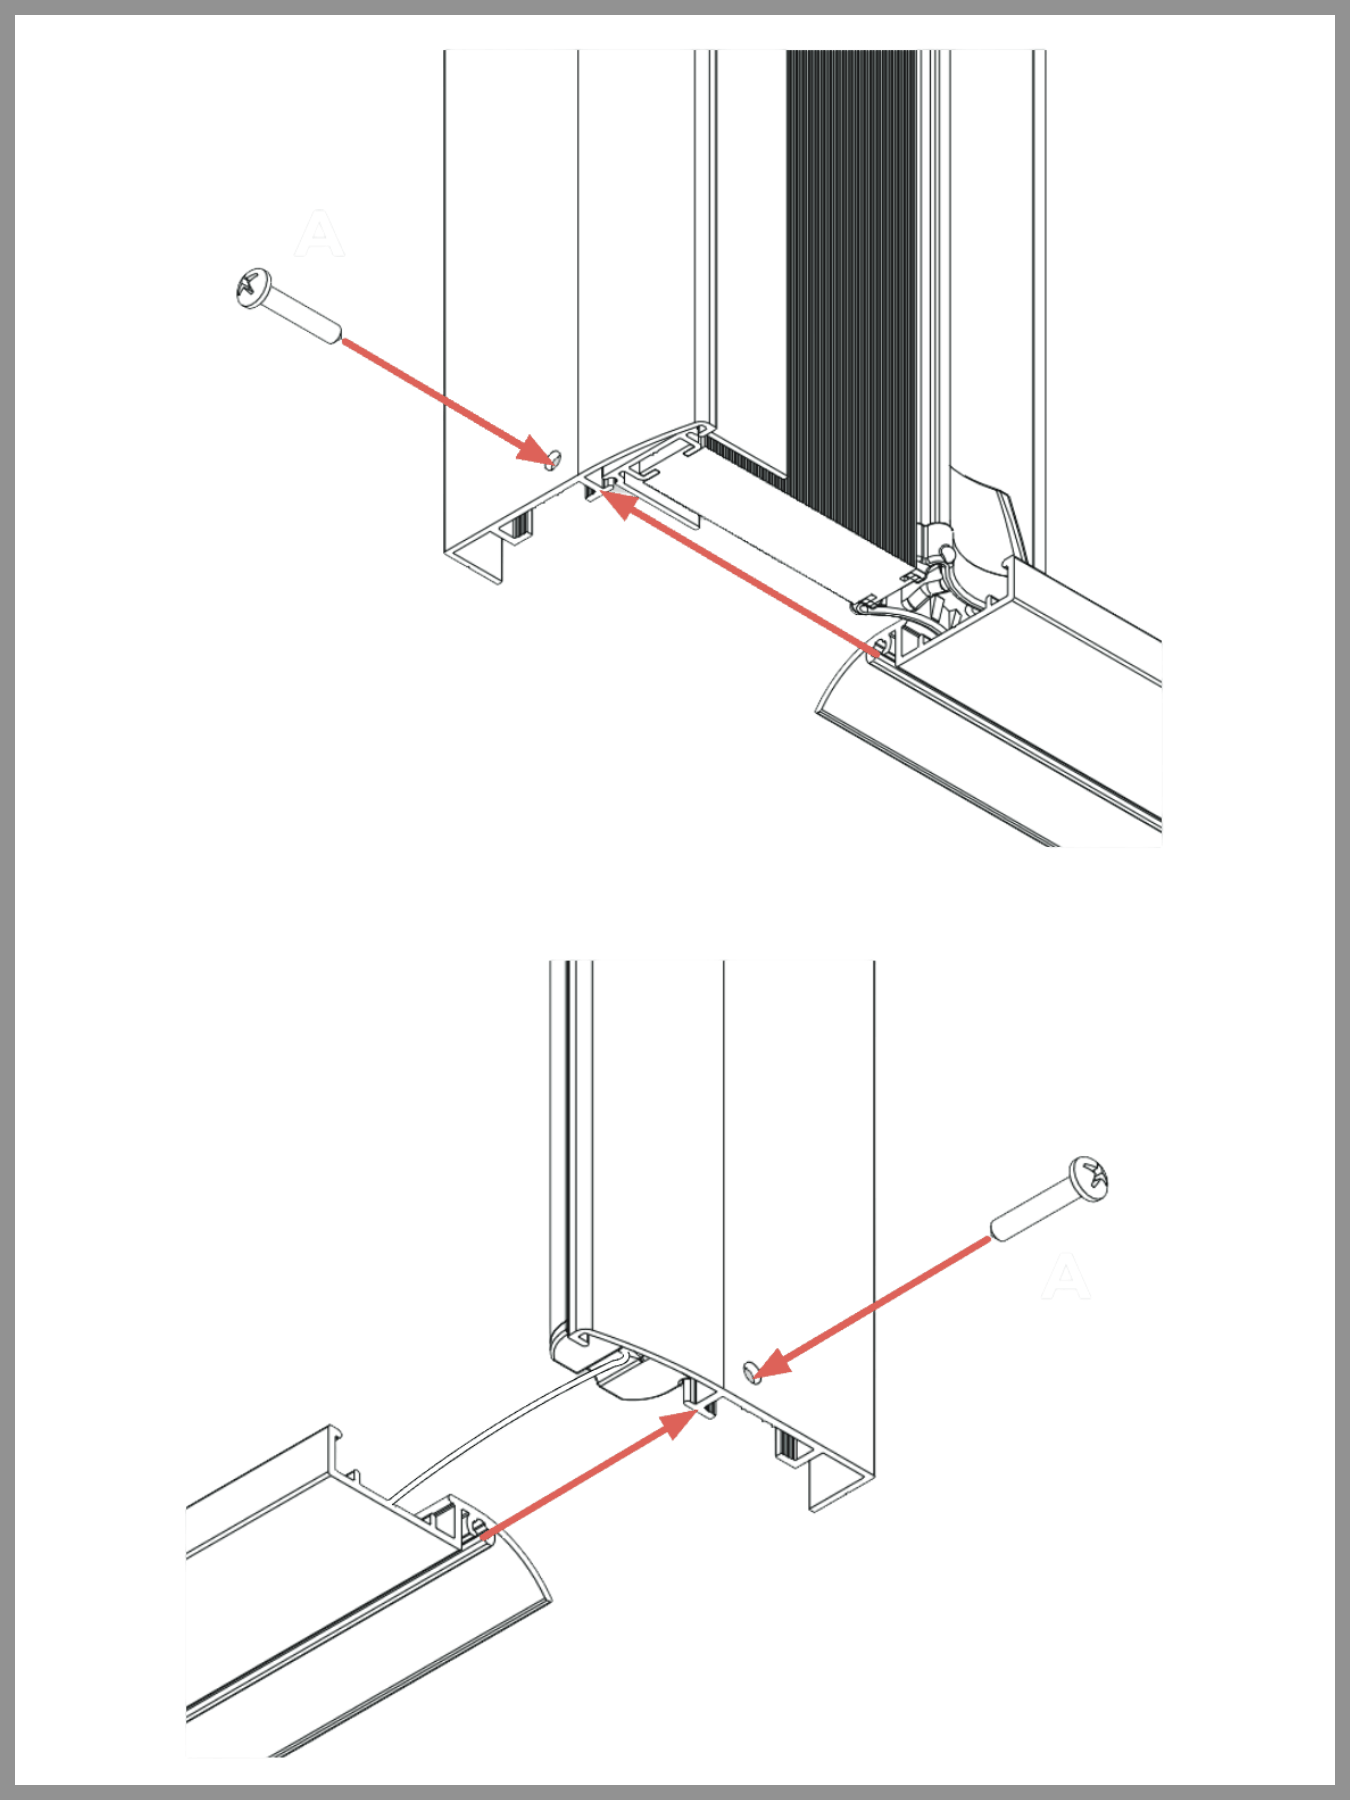
- Position the drawbeam and the closure profile in the lower guide, and screw the lower guide to both sides using the supplied screws.
Note:Also when fitting the lower profile, take care that the cords do not get caught between the sections.
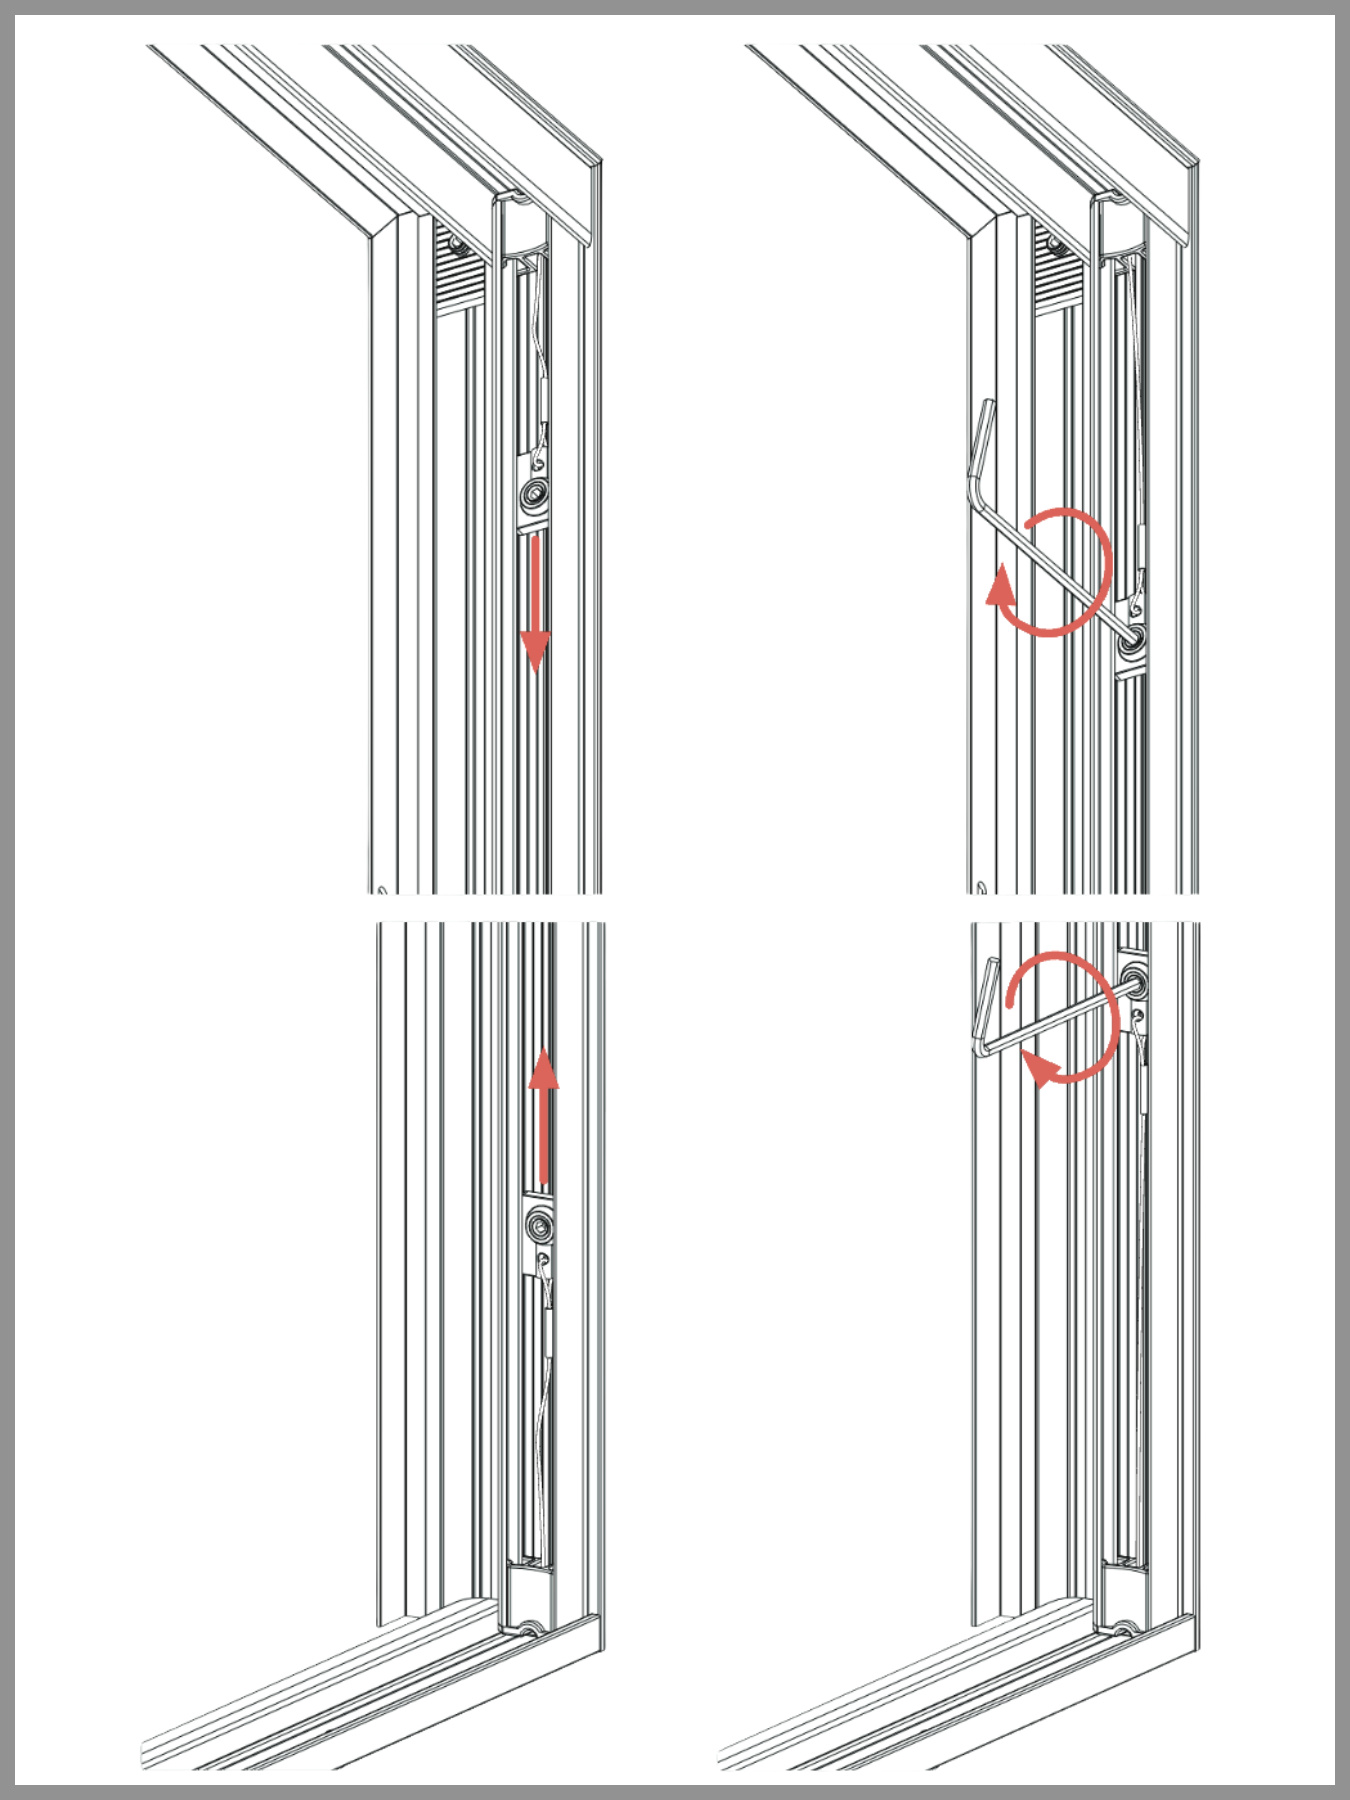
- Move the tension block at the bottom of the closure profile until the cord is under light tension, then tighten the tension block.
- Move the tension block at the top of the closure profile until the cord is under light tension, then tighten the tension block. After completing the previous two steps, check that the drawbeam is straight and moves smoothly. For the best result, the cord at the top and bottom should be under
the same – and preferably light – tension.
Operation
The drawbeam of the screen door is steplessly adjustable in width. Move the drawbeam left and right with one hand to open and close the screen.
Maintenance
Clean the product regularly and carefully with a damp cloth.
Warning! Do not use sharp objects or chemical cleaning agents that could damage the product.
Need further assistance?
If you have any questions or require additional support, don’t hesitate to contact us. We’re happy to help.